
Key Takeaways
Good listing photos help people understand what they are considering before they enquire or book. You do not need elaborate equipment, but you do need a clean space, steady framing, honest editing, and a complete set of images.
- Prepare the room, product, or property before you pick up the camera.
- Use natural light where possible and keep vertical lines straight.
- Photograph both the overall setting and the details guests will care about.
- Edit for brightness and consistency without hiding wear or changing reality.
- Review the finished gallery on a phone before publishing it.
Understand what makes a listing photo effective
A strong listing photo answers a question quickly: What is this place like, and would it suit me? Your gallery should feel like a clear visual walk-through rather than a collection of attractive but disconnected pictures. This listing photo guide focuses on helping you make that walk-through useful, bright, and believable.
Define the story your photos should tell
Think about the experience you want a guest to understand from the first image to the last. For a short-stay property, that might begin with the most inviting room, move through sleeping and living areas, and finish with practical details such as the laundry, balcony, workspace, or outdoor setting. The story should reflect the actual stay, not create expectations the property cannot meet.
A good sequence also gives each room a purpose. Show where someone might have coffee, unpack, work, relax, or prepare a meal. When your photos answer those everyday questions, the viewer can picture how the space would work for them.
Prioritize clarity, accuracy, and visual appeal
Visual appeal matters, but clarity comes first. A bright image with straight lines and a believable colour balance is more useful than a dramatic frame that makes a small room look enormous. Accuracy builds trust before a guest ever sends a message.
Check that important features are visible rather than hidden in shadow. If a room has a narrow layout, a low ceiling, or signs of ordinary use, photograph it fairly and let the written listing provide context where needed.
Match your images to the buyer’s decision process
People usually want reassurance in stages. First, they look for an overall sense of the property; then they check whether the layout, sleeping arrangements, amenities, and condition suit their needs. Your gallery should support that natural assessment instead of making people hunt for basic information.
Put the most persuasive image first, but do not leave practical evidence until the very end. A comfortable bedroom, a usable kitchen, and a clean bathroom can matter just as much as a polished living-room image.
Create a shot list before you start
A short shot list prevents gaps and keeps you from spending too much time repeating the same angle. Write down every major room, outdoor area, useful amenity, and feature that could affect a booking decision. Include a few detail shots, but only when they add information.
You can also note the intended orientation and viewpoint for each image. That small step makes the final gallery feel considered and makes reshoots much easier if the light changes.
Prepare the space, product, or property
Preparation usually improves photos more than a new camera does. Give yourself enough time to clean, move objects, check bulbs, and walk through the space as a guest would. Small visual distractions become much more noticeable once they are enlarged on a screen.
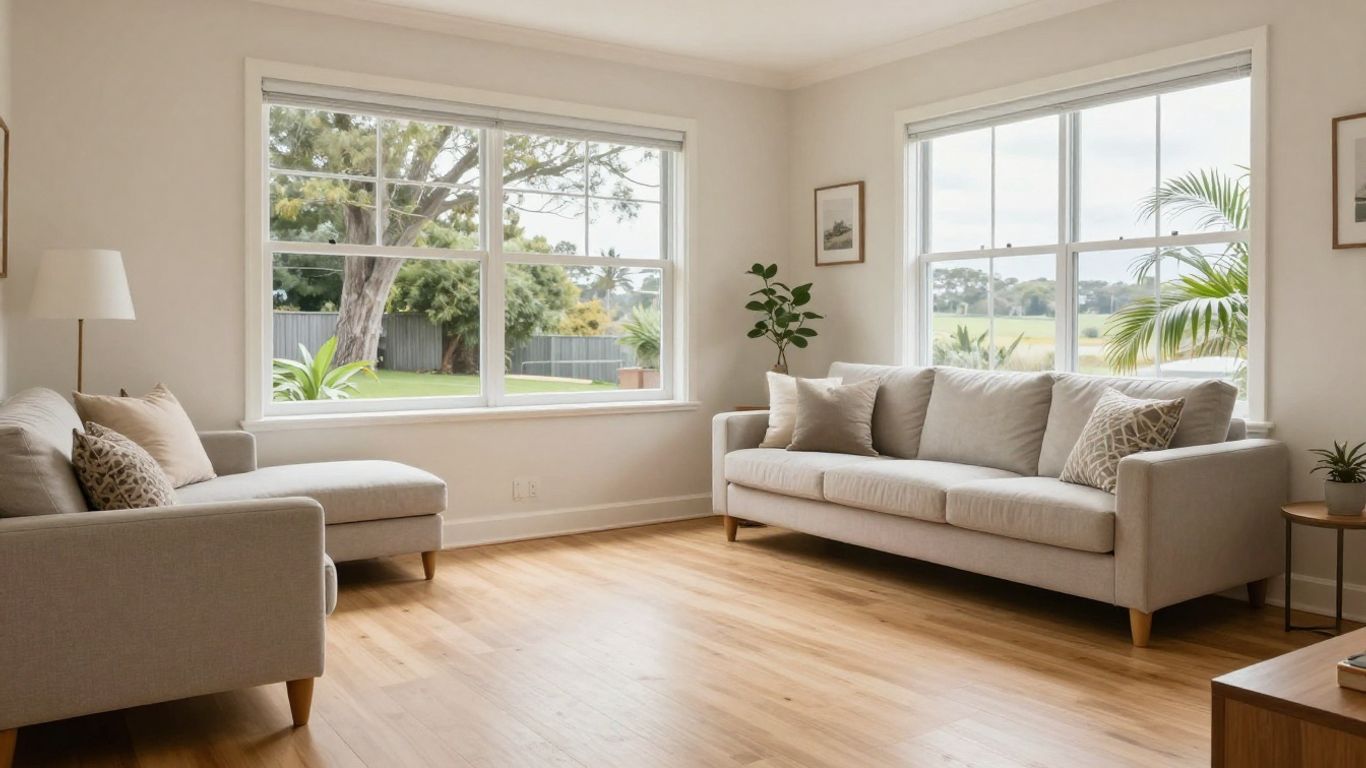
Clean, declutter, and make small repairs
Remove rubbish, wipe reflective surfaces, dust shelves, and vacuum visible floors. Straighten cushions, curtains, towels, bedding, and dining chairs. If a loose handle, marked wall, or burnt-out globe is easy to fix, deal with it before taking photos.
Do not tidy only the centre of the room. Corners, benchtops, bedside tables, and the area around the television often appear in wide shots. A final walk-through at camera height can reveal clutter you missed while standing up.
Choose the best time and lighting conditions
Natural light is often most flattering when it is soft and even. Open curtains and blinds, turn on practical lights when they add warmth, and avoid mixing strongly coloured bulbs with daylight if the result makes the room look uneven. Watch for harsh sun patches that distract from the space.
Take a few test frames from the main viewpoints. If windows become blank white shapes or one side of the room disappears into darkness, wait for a better time, adjust the curtains, or change your position rather than trying to rescue everything later.
Remove distractions and personal details
Guests need to see the property, not your shopping bags, family photographs, charging cables, paperwork, or half-used toiletries. Put away anything that makes the space feel temporary or reveals private information. Keep useful amenities visible, but present them neatly.
A simpler background also helps the eye settle on the room’s shape and features. You do not need to empty every shelf; remove the objects that compete with the main subject or make the space feel crowded.
Stage each scene without making it look artificial
Stage for use, not theatre. A neatly made bed, a clear dining setting, or a folded towel can suggest how the room works without pretending that nobody lives there. Avoid arrangements that look too perfect to touch or props that have no connection to the stay.
Use restraint when adding colour or texture. One plant, a clean throw, or a simple bowl may give a room life, but too many decorative objects reduce the sense of space. The finished image should invite someone in while remaining recognisably real.
For a quick pre-shoot pass, check these areas in order:
- Floors, mirrors, windows, and other large visible surfaces.
- Beds, cushions, towels, curtains, and furniture alignment.
- Kitchen benches, bathroom counters, and bedside tables.
- Light globes, remotes, cables, bins, and personal belongings.
This sequence keeps preparation practical rather than endless. Once the large surfaces and obvious distractions are handled, you can concentrate on composition.
Choose the right equipment and camera settings
You can take useful listing photos with a modern smartphone if you understand its limits. The goal is not to make every frame look like a magazine spread; it is to create a consistent, well-lit record of the property. Simple accessories can help, but careful technique matters more than owning expensive gear.
Decide when a smartphone is enough
A smartphone is often suitable for bright rooms, straightforward interiors, and smaller spaces. Clean the lens, use the main camera rather than an extreme digital zoom, and hold the device steadily. Take test photos to see how it handles windows, lamps, and darker corners.
A dedicated camera may give you more control in difficult light or large properties, but it will not automatically solve clutter, poor framing, or inaccurate colour. Start with the device you know how to operate well.
Use tripods, reflectors, and other helpful accessories
A tripod is useful when the light is low and you need a slower shutter speed without shaking the camera. It also helps you repeat the same height and viewpoint across several rooms. A small reflector or pale surface can gently bounce light into a shadowed area.
Keep accessories out of the final frame and avoid forcing extra light into a room if it creates strange shadows. The support should make the image steadier and more balanced, not more complicated.
Keep the camera level and the composition balanced
Hold the camera around chest height and keep it level. Tilted walls and door frames make interiors look unstable, while an overly wide angle can stretch furniture and mislead the viewer about the room’s proportions. Include enough floor and ceiling to explain the space without letting either dominate.
Look at the edges before pressing the shutter. A cropped chair, hanging cable, or half-visible doorway can make an otherwise good composition feel accidental. Step back where possible instead of relying heavily on a wide setting.
Adjust exposure, focus, and white balance
Tap to focus on the main area and check whether the exposure has made windows, lamps, or pale walls too bright. If your phone offers exposure control, make small adjustments rather than chasing a dramatic effect. Lock focus and exposure when you are taking several frames from one position.
White balance should keep walls looking neutral and timber looking natural. If different rooms shift noticeably from blue to yellow, correct the cause where you can by changing the light mix or shooting at another time.
Capture a complete set of listing photos
A complete gallery gives viewers confidence because it shows how the parts fit together. Start with the strongest overall image, then move through the property in a logical order. Include enough coverage to answer ordinary questions without uploading many near-identical frames.
Start with a strong primary image
Your first image should be bright, tidy, and immediately understandable. Choose a view that shows the property’s strongest feature or the room guests are most likely to care about. Avoid using a close-up detail as the opener unless the item itself is the main subject of the listing.
The primary image sets expectations for everything that follows. If it feels spacious and calm, the next photos should support that impression honestly rather than reveal a completely different level of care.
Photograph wide views and important details
Use wide views to explain layout, then add closer images for features that would otherwise be missed. A kitchen overview might be followed by the coffee machine, cooking equipment, or storage. A bedroom overview might need a separate view of the wardrobe, desk, or window.
Details should answer a question, not merely fill space. If a close-up does not show a useful feature, condition detail, or amenity, it may not belong in the gallery.
Show scale, condition, and useful features
Viewers need clues about size. Include familiar furniture where it helps, and avoid shooting every room from an extreme corner that makes it appear larger. Show the condition of surfaces and fittings clearly, especially where a guest might reasonably have expectations.
Useful features deserve straightforward coverage: parking access, outdoor seating, storage, heating or cooling controls, and sleeping arrangements. Do not assume a viewer will infer these from one distant image.
Use consistent angles throughout the set
Consistency makes a gallery easier to scan. Keep the camera at a similar height, use related angles for comparable rooms, and maintain a similar colour balance. This does not mean every photograph must be identical; it means the changes should come from the property rather than from random technique.
Review pairs of images side by side. If one room looks noticeably warmer, wider, or darker than the next, revisit the camera position or plan a modest edit later.
Edit photos while keeping them accurate
Editing should polish a truthful photograph, not redesign the property. Work from the original files and make small changes that bring the image closer to what you saw in person. If an edit makes you pause and wonder whether the room really looked that way, reduce it.
Correct brightness, color, and perspective
Lift shadows carefully, reduce highlights when windows are distracting, and adjust colour until whites and neutral walls look believable. Correcting perspective can help vertical lines appear straight, especially in interior photographs. Make these changes consistently across the set.
Avoid making a dark room look sunlit or turning a grey day into a different season. A guest should recognise the space when they arrive.
Crop images for different listing platforms
A crop should improve the composition while preserving useful context. Keep important furniture, entrances, windows, and amenities inside the frame. Check whether a platform favours a wide, square, or taller display before preparing the final version.
Save a full, well-composed original as well as the cropped copy. That gives you flexibility if the listing layout changes or you need the image for another channel.
Remove minor distractions without hiding flaws
Small sensor spots, a stray speck, or an accidental bit of lint can usually be removed without changing the scene. Be cautious with digital cleanup around furniture edges, fittings, and surfaces. If the correction changes the apparent condition, it has gone too far.
Keep a simple before-and-after check open while editing. This makes it easier to notice when repeated adjustments are gradually making the image brighter, sharper, or cleaner than reality.
Avoid filters and edits that misrepresent the listing
Heavy presets can shift colour, erase texture, and make every room look strangely alike. Do not remove permanent marks, alter furniture, add views, or expand the apparent size of a room. Honest images reduce unpleasant surprises and help attract people who are a genuine fit.
If you need to disclose a feature in the listing text, do so plainly. A photo should support that explanation, not quietly conceal it.
Optimize photos for online listings
A well-made image still needs to work inside a gallery and on a small screen. File preparation affects loading, clarity, and how easily people can compare one photo with the next. Keep the process simple and check the actual uploaded result rather than assuming it will appear as it did in your editor.
Choose the right order for your image gallery
Lead with the clearest overall view, then move through the property in a sequence that feels natural. Group related images together, such as living area, kitchen, bedrooms, bathroom, and outdoor space. Place practical details near the room they belong to.
Do not hide a significant limitation at the end. If a compact bathroom, unusual sleeping arrangement, or restricted view affects the decision, show it clearly and describe it in the listing.
Write descriptive file names and alt text
Descriptive file names make your own library easier to manage. Use plain words that identify the room and feature, such as living-room-window-seat.jpg, rather than a string of camera numbers. Alt text should briefly describe what is visible for people using assistive technology.
Keep descriptions factual and concise. Mention the room and its main feature, not a sales claim the image cannot prove.
Resize and compress images without losing quality
Export images at a sensible size for the listing platform and inspect the result at normal viewing size. Excessive compression can create blocky edges, muddy shadows, and soft text on appliances or controls. Very large files, meanwhile, may load slowly on a mobile connection.
Keep your original files backed up separately. That way you can create a new export without repeatedly compressing the same image.
Check how photos appear on mobile devices
Open the listing on a phone before you publish or share it. Look for crops that remove key features, galleries that load out of order, and images that become too dark on a smaller screen. Scroll through as if you were a first-time viewer rather than the person who made the photos.
A final mobile check often catches more than another round of editing. If the property is difficult to understand on a small display, adjust the order or replace a weak image.
Fix common listing photo problems
Not every shoot goes smoothly. Weather changes, reflective surfaces, cramped rooms, and mixed lighting can all create problems. Diagnose the cause before reaching for an editing slider, because a small change in position or timing is often cleaner than a large correction afterwards.
Recover from dark, blurry, or uneven images
For a dark image, first check whether the camera was facing a bright window or whether the room simply needed more light. For blur, use a steadier support, a faster shutter setting, or a brighter time of day. Uneven exposure across a set may require reshooting some rooms so the gallery feels consistent.
Do not sharpen a blurred image until it looks crisp. Excessive sharpening creates harsh edges without restoring missing detail, and it can make dust or surface marks more obvious.
Handle reflective surfaces and difficult rooms
Mirrors, windows, glossy benchtops, and screens can reveal the camera or photographer. Change your position slightly, turn off screens, remove unnecessary reflections, and watch the edges of the frame. In a narrow room, a doorway may provide a better viewpoint than standing in the centre.
Avoid extreme wide-angle settings that bend lines or make fixtures appear oddly large. Showing a little less space is preferable to giving a misleading impression of its proportions.
Know when to reshoot instead of over-edit
Reshoot when the focus is soft, the room is misrepresented, a key feature is hidden, or the colour cannot be made consistent without looking unnatural. It is usually faster to fix the cause while the space is ready than to spend a long time repairing a weak frame.
Keep notes about what went wrong. You may only need to move a lamp, wait for cloud cover, clean the lens, or raise the camera slightly on the second attempt.
Decide when professional photography is worth the cost
Professional photography can be worthwhile when the property is large, architecturally distinctive, difficult to light, or central to a high-value marketing effort. It may also make sense when you do not have the time or confidence to create a complete, consistent gallery yourself.
For a smaller or straightforward property, careful preparation and a modern phone may be enough. Compare the likely benefit with the effort involved, and choose the option that produces clear, honest images your listing can support.
Frequently Asked Questions
How many listing photos should you take?
Take enough to show the layout, major rooms, useful amenities, outdoor areas, and relevant condition details. The right number depends on the property, but each image should add information rather than repeat another angle.
Should listing photos be portrait or landscape?
Landscape orientation usually gives you more room to show interiors and is easier to crop for many galleries. Follow the platform’s requirements, and keep your orientation consistent unless a particular feature genuinely suits a taller frame.
Is a smartphone good enough for listing photos?
A smartphone can work well when the lens is clean, the light is suitable, and the camera is held steadily. Good preparation and composition matter more than simply using expensive equipment.
Should you turn on all the lights?
Turn on lights that make the room feel balanced, but avoid mixing bulbs with very different colour temperatures. Test the result, since some rooms look more natural with daylight alone.
How do you make a small room look good without misleading viewers?
Use a level camera, a sensible viewpoint, and uncluttered surfaces. Step back where possible, but avoid extreme wide-angle settings that stretch furniture or make the room appear larger than it is.
What should you remove before taking listing photos?
Remove rubbish, cables, personal documents, private photographs, excess toiletries, and objects that obscure the room’s function. Keep useful amenities visible and arranged neatly.
When should you retake a listing photo?
Retake it when the image is blurry, too dark, badly distorted, inconsistent with the rest of the gallery, or unable to show an important feature clearly. A short reshoot is better than an edit that misrepresents the property.